


.avif)





Search for a cold weather plumbing checklist, and you will get the same list every time: insulate your pipes, disconnect the garden hose, let the faucets drip overnight. It is good advice, and it is written for Chicago.
California is a different story. In years of work across the area, our plumbers haven't run into a single frozen pipe. We can't even tell you which spot freezes first — crawlspace, garage, or hose bib — because those calls don't come.
That doesn’t mean nothing goes wrong in winter. It means the risks here are different ones, and they get ignored precisely because everyone is busy writing about ice. This is the checklist that fits the climate you actually live in.
What Actually Goes Wrong in a Bay Area Winter
Water heaters fail on the coldest week of the year, and it's not a coincidence. Incoming water in winter is much colder than in July, so your heater works longer and harder for the same shower. A tank that was quietly limping along all summer picks winter to quit — which is why replacement calls cluster in the cold months.
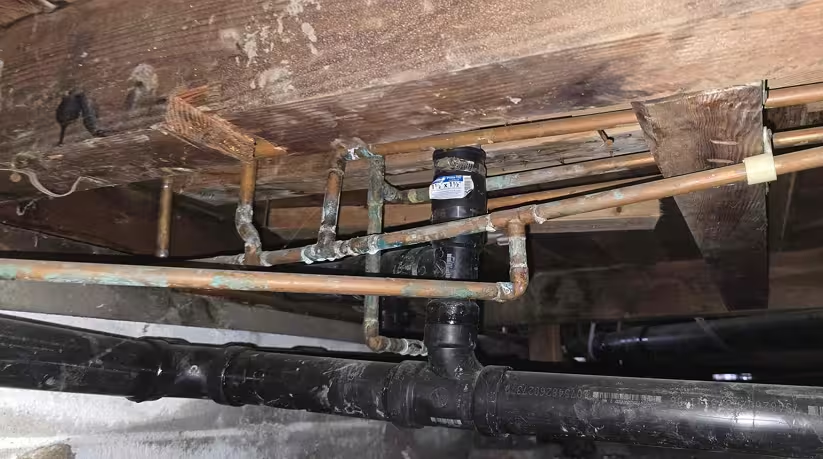
Pipes here fail because of age and material rather than ice. One point from our plumbers is worth repeating: when one pipe fails, it can affect multiple areas of the home, because the same material was usually run throughout. We most commonly see this pattern with PEX and Type M copper, which means one failure is often a preview of the next.
The more expensive version of the same problem is the slow leak, a fitting weeping behind drywall or under a slab for weeks with no dramatic burst, because the repair is cheap and the restoration is not. And then there is the holiday load on drains and disposals, when six weeks of cooking and guests put more grease and food waste down the line than the previous six months.
None of those are seasonal the way freeze damage is seasonal, which brings up the most useful thing our plumbers told us.
There Is No "Fall-Only" Plumbing Inspection
We asked what is on the fall checklist specifically, and the answer was that there is not one, and there does not need to be. Our standard plumbing inspection runs year-round, and the same checks apply in October as in April, because the failure modes here are not weather-triggered. None of it is specific to a season.
That is good news for you. You are not on a deadline; you are on a schedule, and any month is a fine month to start.
The Full Plumbing Inspection Checklist
This is what an IRBIS technician actually works through on a plumbing inspection. Most of it you can walk by yourself, flashlight in hand, in about half an hour — and where you can't, at least you'll know what should have been looked at.
- Inspect all visible water supply and drain lines, horizontal and vertical, for leaks, corrosion, wear, or damage
- Inspect exposed water, drain, and gas piping for signs of deterioration
- Check water heater operation
- Inspect water pressure and identify any visible pressure-related concerns
- Test and inspect all toilets for proper operation
- Inspect all faucets, shower valves, and fixtures for leaks and proper operation, and clean aerators if needed
- Inspect sink drains and P-traps
- Inspect the garbage disposal, if installed
- Inspect water softener, whole-house filtration, and reverse osmosis systems, if installed
- Inspect the main water shut-off valve and other accessible shut-off valves for proper operation
- Inspect hose bibs and exterior faucets for leaks or damage
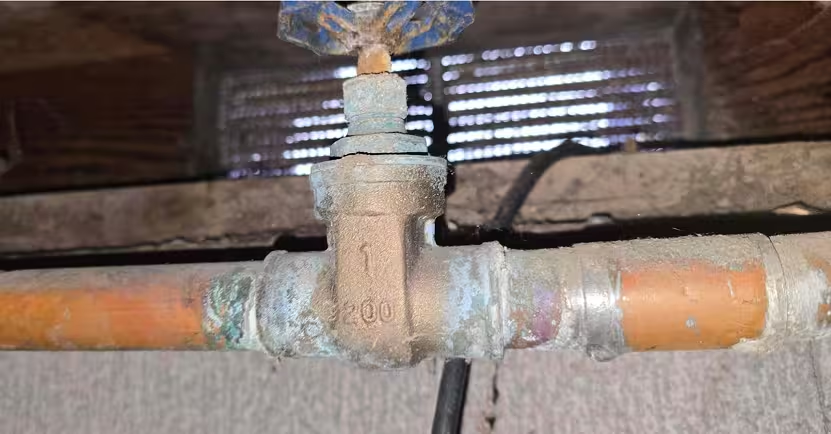
If you do only a few things off that list yourself, start with the main shut-off valve — and don't just locate it. Actually operate it. A valve that hasn't moved in fifteen years often won't move when you need it to, and the moment you need it is the moment water is coming through a ceiling.
Next, check under every sink and behind every toilet: green or white crust on fittings, dampness, warped cabinet floors, any stain that wasn't there last time. Run your hand along the underside of each trap — fingers find slow leaks that eyes miss.
Finally, put a $12 gauge on any hose bib and read your pressure. Anything above 80 psi is hard on every fitting, valve, and appliance in the house, and it shortens water heater life.
Water Heater Maintenance Checklist
Your water heater is the most expensive thing on this list to replace and the most likely to fail this winter, so give it ten minutes with a flashlight.
Start with its age — the most useful number you have. Most tank water heaters we replace are roughly eight to ten years old. If yours is in that range and working fine, it's not an emergency, but it is time to stop treating replacement as a distant problem and start treating it as a decision you'd rather make on a Tuesday than at 6 a.m. on a Sunday with no hot water. The manufacture date is encoded in the serial number on the label, and most manufacturers publish a decoder online.
%201_converted.avif)
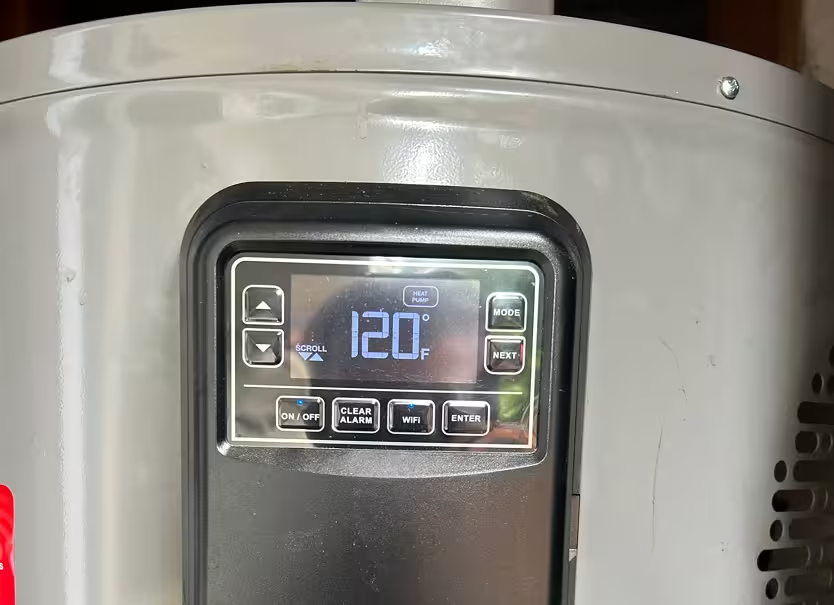
Then look at the tank itself. Rust streaks, corrosion at the fittings, or moisture on the floor around the base all point in the same direction, and a leaking or rusting tank is not repairable. Check the temperature setting while you are there, since 120°F is the standard recommendation and many units ship set higher: it is hot enough for household use, reduces scald risk, slows mineral scaling, and cuts standby losses. Check that the temperature and pressure relief valve, the tank's primary safety device, has a discharge pipe running down toward the floor and that it is dry rather than dripping or corroded, and never cap it. Check the seismic strapping too, since California requires water heaters to be braced, typically with two straps at the upper and lower thirds of the tank. Missing straps are one of the most common things we find on older installations.
Finally, listen during a heating cycle. Popping, rumbling, or crackling is water boiling under a layer of sediment on the tank bottom, which costs you efficiency and capacity and eventually the tank itself. Flushing helps, but on a heavily scaled older tank, a flush can dislodge material and reveal a leak the sediment was effectively plugging, so if your heater is past eight years and has never been flushed, have a plumber do it rather than doing it yourself. Tankless owners have a different task: descaling, roughly annually depending on water hardness, with skipped descaling showing up as fluctuating temperatures and error codes.
Repair or Replace?
Our rule of thumb comes down to age plus the cost of the failed component. Replace when the tank itself is leaking or visibly rusting, since there is no repair for a failed tank, and replace when a major component such as the gas control valve fails on an older unit, because putting an expensive part into an eleven-year-old tank is usually money you will spend again soon. Repair is generally the better call when the unit is under eight years old and the failure is a thermocouple, igniter, element, or thermostat, or when the problem is a valve, fitting, or connection rather than the tank.
The Cost Math on Leaks
This is the part worth being blunt about. A typical pipe repair runs roughly $800 to $1,500 depending on the situation. That is the repair alone. It is not the drywall, the flooring, the cabinetry, or the mitigation company running fans in your house for four days, and water damage restoration is routinely a multiple of the plumbing bill. If the leak ran undetected inside a wall, it can be an order of magnitude more.
That gap is the entire argument for early detection. A smart water monitor is one example, around $1,900 for the Moen unit, which sits on the main line, learns your normal usage, alerts you to abnormal flow, and can shut the water off automatically. Whether that specific product is right for your home is a conversation, but the principle is not really debatable: with leaks, detection time is the variable that decides the size of the bill.
Final Thoughts
A yearly plumbing inspection is one of the most practical things a homeowner can do, and when the supply lines, shut-offs, and water heater are all sound, the system runs quietly in the background for years without a second thought. The key is finding a weeping fitting or an aging tank on a scheduled visit rather than at 6 am on the coldest morning of the year.
If you would like help assessing your water heater, deciding between repair and replacement, or scheduling a plumbing inspection, call IRBIS at +1 (669) 312-3643 or contact us online to schedule a consultation.
During a repair visit, our technicians will inspect your A/C system, diagnose the problem, and provide you with repair options. Once you choose an option, we'll proceed with the necessary repairs. Afterward, we'll test the system to ensure it's working correctly and provide you with a detailed report.