.avif)


As electric vehicles become more common across the Bay Area and beyond, many homeowners are choosing to install EV chargers at home for convenience, lower charging costs, and better control over their daily driving routine. Whether you are planning a Level 1 upgrade or a high-powered Level 2 charger, preparing your electrical system is an essential part of successful EV charger installation.
This guide explains what you need to know before installing a charger, how to determine if your electrical panel can support the added load, and what steps ensure a safe and efficient setup.
Understanding Home EV Charging Levels
Most home charging solutions fall into two categories. A Level 1 charger uses a standard 120-volt household outlet. It is easy to use and requires no major upgrades, although charging is slow and best suited for light daily driving. A Level 2 charger operates on a 240-volt circuit and is the most common option for homeowners. It offers significant improvements in charging speed and requires dedicated wiring and professional installation.
Deciding between these options affects the complexity of your electric vehicle charger installation, so it is important to understand your driving habits, daily mileage, and available electrical capacity.
Evaluating Your Electrical Panel Capacity
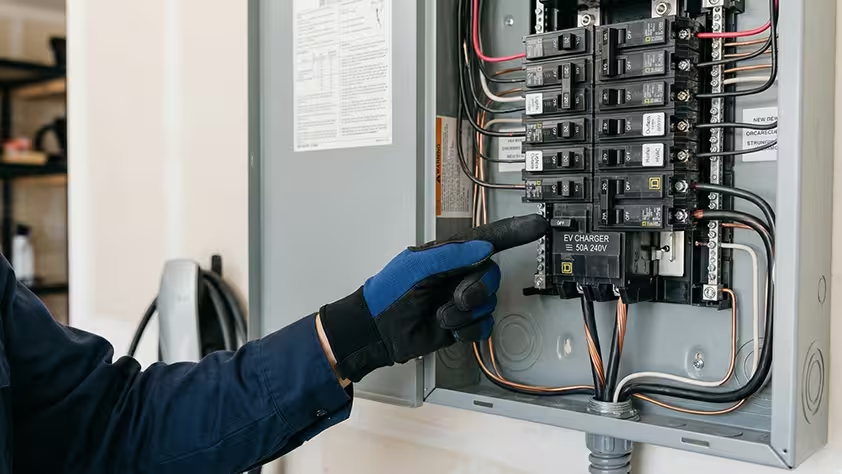
Before beginning an electric car charger home installation, determine whether your electrical panel has enough amperage to handle an additional 240-volt circuit. Many older homes were built with panels sized for smaller household electrical loads. When new appliances, HVAC equipment, or EV chargers are added, the panel may require upgrades.
A typical Level 2 charger draws between 20 and 50 amps, depending on its size. Your electrician will calculate the total electrical demand of your home and confirm whether your panel can safely accommodate the new circuit. If the panel is undersized, an upgrade ensures long-term safety and allows room for future electrical needs.
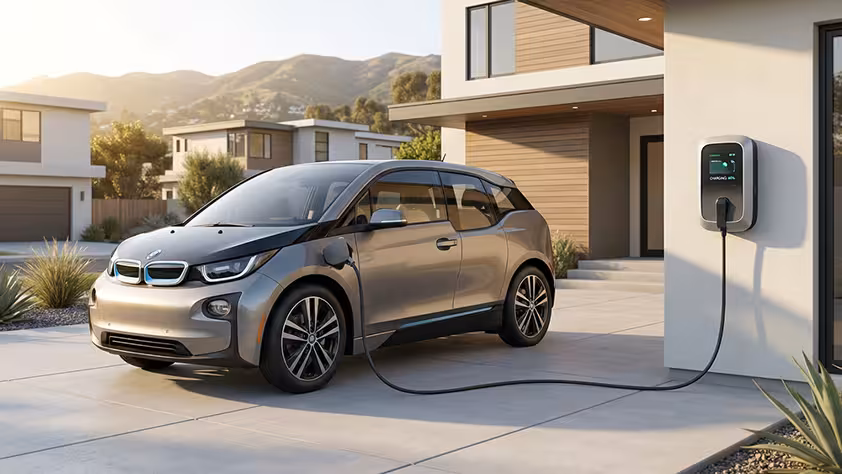
Choosing the Best Location for Your EV Charger
Selecting the optimum charger location influences installation cost and convenience. Most homeowners place the charger in a garage or carport. If you park outside, a weather-rated charger may be installed on an exterior wall close to the driveway. The charger should be mounted where the cable can easily reach your vehicle without strain or obstruction.
Distance from the electrical panel also matters. Longer wiring runs increase installation complexity and cost. By planning the layout, you can streamline the EV charger installation process and improve daily usability.
Assessing Wiring and Circuit Requirements
A Level 2 charger requires a dedicated 240-volt circuit with wire size appropriate for the amperage of the charger. Incorrect wiring can cause overheating and decreased system lifespan. Using the proper breaker type ensures safe operation and prevents nuisance tripping.
Some chargers require hardwired connections, while others use a NEMA receptacle. Understanding your charger model helps the electrician determine the correct materials and setup method. Even if you plan to install the charger later, preparing the circuit in advance provides flexibility for future upgrades.
Considering Smart Charger Features and Electrical Load Management
Modern EV chargers often include smart features such as Wi-Fi connectivity, load balancing, and scheduled charging. These functions allow the system to operate efficiently even when your home has other appliances drawing power. In areas where time-of-use electricity rates apply, scheduling charging during off-peak hours can reduce monthly energy costs.
Load management also prevents the electrical panel from becoming overloaded. The charger can automatically adjust its amperage based on available capacity, improving safety and optimising performance.
Permits and Code Compliance
Local building codes require permits for most electric vehicle charger installation projects. Permits ensure that the wiring, breaker choice, grounding, and mounting meet safety standards. Hiring a licensed electrician simplifies the process since professionals understand code requirements, utility rules, and municipal inspection procedures.
Ensuring compliance also protects homeowners from complications during property sales or insurance claims.
Preparing for Future Electrical Needs
Installing an EV charger is often the first step toward modernising a home's electrical infrastructure. Many homeowners eventually add solar panels, battery storage, upgraded HVAC equipment, or additional chargers. Planning for future needs now can prevent costly modifications later. Considering a panel upgrade, conduit installation, or additional outlets preserves flexibility and supports long-term energy goals.
Conclusion
Preparing your electrical system for an EV charger requires careful assessment of panel capacity, wiring needs, charger placement, and code compliance. When these steps are handled correctly, a home charging station offers fast, reliable, and safe performance. If you want expert help with evaluation or full-service EV charger installation, contact IRBIS today. Call +1 (669) 312-3643 or reach out online to schedule a consultation. Our team provides professional inspection, clear recommendations, and precise workmanship to ensure your electric vehicle charging setup is ready for daily use.
FAQ
[[faq|name=What is the main difference between Level 1 and Level 2 charging?|text=Level 1 charging uses a standard 120-volt household outlet. While convenient, it is very slow, often taking 20+ hours for a full charge. Level 2 charging requires a 240-volt circuit (similar to a clothes dryer) and a dedicated charging station. It charges your vehicle 5 to 7 times faster, making it the practical choice for daily driving.]]
[[faq|name=How do I know if I need to upgrade my electrical panel?|text=Most Level 2 chargers require a dedicated 40 to 60-amp circuit. If your home has an older 100-amp panel that already supports a range of heavy appliances (AC, electric stove, etc.), you may need an upgrade to a 200-amp panel to prevent overloads and ensure your home can handle the added demand safely.]]
[[faq|name=Do I really need a permit for EV charger installation?|text=Yes. In most Bay Area jurisdictions, installing a new 240-volt circuit requires a building permit. This ensures the installation meets all safety codes, which is vital for your home insurance coverage and will be necessary if you decide to sell your property in the future.]]
[[faq|name=Where is the best location to install the charger?|text=The most common locations are inside a garage or on an exterior wall near the driveway. When choosing a spot, consider the length of the charging cable (usually 18 to 25 feet) and the proximity to your vehicle’s charging port. Additionally, keeping the charger closer to your electrical panel can help reduce installation costs.]]
[[faq|name=Can smart charging features actually save me money?|text=Absolutely. Many Level 2 chargers allow you to schedule charging via a smartphone app. In California, many utility companies offer "Time-of-Use" (TOU) rates where electricity is significantly cheaper during off-peak hours (usually late at night). Scheduling your car to charge during these times can drastically lower your monthly energy bills.]]
[[faq|name=Does my charger brand have to match my car's brand?|text=No. Most modern EV chargers use a universal J1772 connector that works with almost every electric vehicle on the market. While Tesla uses a different connector (NACS), they provide adapters that allow their vehicles to use any standard Level 2 station. You can choose a charger based on the features, cable length, and design you prefer.]]
During a repair visit, our technicians will inspect your A/C system, diagnose the problem, and provide you with repair options. Once you choose an option, we'll proceed with the necessary repairs. Afterward, we'll test the system to ensure it's working correctly and provide you with a detailed report.